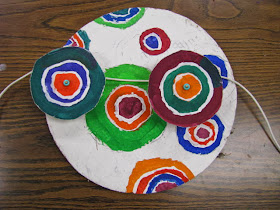
I started saving cardboard circles from frozen pizza the minute I saw the original lesson presented at conference (send out an email to the staff and you'll be AMAZED at how many you'll get.
 |
| Handy-dandy FREE paint pallet from the school cafeteria. Apple shipping crates cut in half--I use them every day. We use them once and trash them, but they could probably be used a couple of times. |
The painting did take a while, and I ended up having to give them white and small brushes for the many students who forgot to leave the sliver of white between their colors.
When they finished their pizza circle, I gave them a bit of leftover mat board and had them draw two more circles in the same fashion, and paint them intermediate colors. When they finished and everything was dry, they cut out their two circles on the mat board.
Now the real fun begins! Carefully using old compasses (think the metal pointy kind) students put holes in the middle of their cut out circles and two holes where the wanted to put them on their larger circle. I pre- hot glued pony beads to one end of three inch sections of the thinnest dowels I could buy (they're so thin I was able to cut them to three inch lengths with scissors).
I then demonstrated
 |
| Pre-glued bead on bottom, then pizza circle, then spool, then cut out mat board, finally a bead on top. |
I saved spools for this project from my own sewing at home, and also sent out another email and got many that way. I did tell students to choose two different sized spools (a small and regular sized, for example). In the Dick Blick lesson, they tell you to order a specific size, but I just used what I had available to me. After they had them together, they brought them to me to hot glue the top bead. After the glue dried/cooled, students used scissors to cut the top bit of dowel off.
 |
| This one doesn't have the bead glued yet, but you can see the dowel bit that will need to be trimmed. |
The next time they came to art I showed them how to add the cord to make them spin (see the linked Dick Blick lesson for directions). There was a bit of "play" at this point to get them to work, and some work better than others. It became apparent that it's very important for me to make sure I hot glue them pretty flush, with not much wiggle room, or they don't turn well.
 |
| Still need to add the cord, but I really like the colors on this one. |
It just worked out perfectly that they'd reviewed simple machines in their science part of their classes. A-MAZE-ING!!!!


No comments:
Post a Comment