
This is a lesson I got from the Lovely Ladies of Saint Paul's Episcopal Day School in Kansas City, MO. They share a lot of their lessons at state conferences and through Arts and Activities. It's a very popular lesson, one I get requests from students, parents, and other staff ("When are you doing the mummies?" "Is my class making mummies this year?"). I give them a pattern to trace, handouts with a variety of sarcophagus images, and have them begin working while I take their photographs. They can't smile in their pictures because they're their death masks. (The first year, I didn't explain that to the teachers and they were disturbed by all these photos of somber children).

 |
| Close up of the bottom of her sarcophagus. |
They draw in pencil, and trace in Sharpie, but I don't let them work on the head area until they get their photograph back. This year, we colored with construction paper crayons. My favorite markers to use with this project was the Fooey gel markers, but alas, they don't make them anymore :-(!
 |
| They're large--maybe four feet tall or so. |
 |
| He spent lots of time on his head, and ran out of time for parts of the rest. |
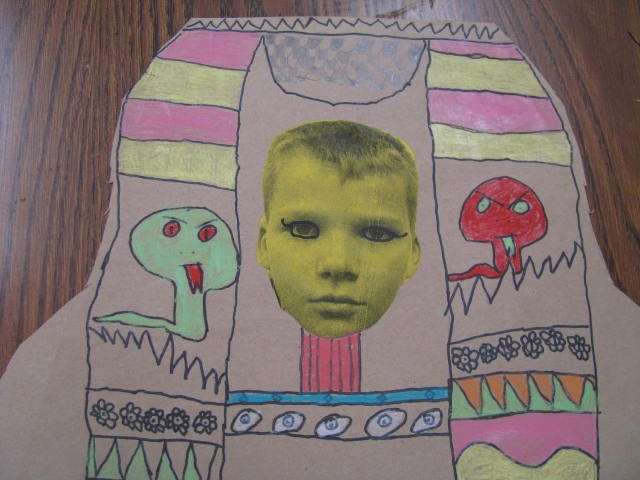 |
| I love his nemes around his face--very creative! |
We also use Egyptian hieroglyph stamps to add spells of protection to our mummies.
 |
| He worked very hard on his coloring! |
 |
| I love how she tried to add the arms, very difficult for a third grader! |
 |
| This one is soooo beautiful. |
I should probably also tell you that before we do this project I get the Egyptian kit from my local art museum. The students get to smell Egyptian scents like myrh and frankenscense, play the game Senat, look at other "artifacts" so they're really excited and knowlegable by the time this project starts.
 |
| Boys could add a beard, but he didn't want to. |
 |
| So colorful! |
 |
| He's very detailed, so it's fitting that his sarcophagus looks like this. |
Our very last step is to add marker around the eyes to make "Egyptian eyes".

