Monday, April 21, 2014

Wonderful Paintings. . . What's That Smell?


I've had many student teachers over the years, and this lesson is from one of them (her name was Amy, but I'm drawing a total blank on her last name, which probably isn't important since she was getting married shortly after student teaching).  A particular university near where I live and work has a masters program for adults wanting to go into teaching when they have a bachelor's degree in another field.  Interested people get a master's degree and teaching certification in one swoop, which sounds fabulous, and on some levels it seems to work well.  Here's my beef with it: students in this program are never taught how to make lesson plans.  When I've had student teachers from this program and ask to see their plans, they show me something they got off the internet or tell me a broad idea.  Now, don't get me wrong, we all get great stuff off the internet (or you wouldn't be looking at blogs for ideas!) but lesson planning is IMPORTANT.  Especially starting out, I'd go so far as to call it vital.  The first time it happened I couldn't really believe a college teaching program anywhere wouldn't be teaching lesson planning, but after some investigation, yep, it's true.  Not a great service to pre-service teachers, so I asked Amy to come up with a lesson on her own around the theme of Vietnamese art.  She did a great job, and I've used her lesson and powerpoint several times.
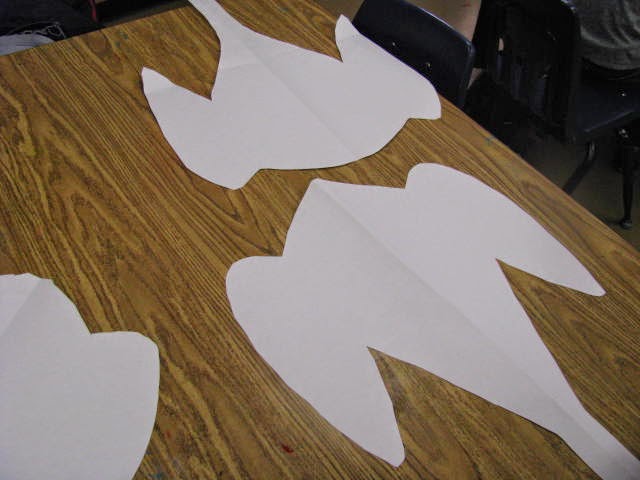
It's a quick and easy powerpoint about traditional Vietnamese woodcuts, and the assignment is that students create a drawing based on one of the traditional themes, such as Good Luck Wishes (a hen with chicks or pig with piglets):


Folk stories (frog in the form of a scholar):


 Mythical and historical figures (we don't know Vietnamese history well in the midwest of the U.S., so I just let them make this up):


Social activities like picking coconuts or wrestling, or the spirit (12 signs of the Chinese Zodiac).

I love sixth graders sense of humor, because some were just a crack up!


In traditional Vietnamese paintings, natural materials were used to make the inks, pigments and paint; things like bamboo and tree sap.  To get the whole making-our-own-paint experience, students mixed milk paint out of equal parts powdered milk and water then added powdered tempera.  Each table mixed a color or two, and it was stored in containers with tight-fitting lids (old cottage cheese containers work well).  One student at the end of each class had the job of taking our box of paint-filled containers to the cafeteria each time to be refrigerated.  Let me tell you, this paint stinks.  Like, don't-even-think-of-doing-this-lesson-if-you're-pregnant (or any of your nearby co-workers are).  It's SO very stinky, but dries with this nice glossy finish that's impossible to photograph.  A little bonus, it smells so awful that the students keep their lips tightly sealed while painting so they can't smell it as much (less talking and noise for the teacher!).  Unfortunately, the art teacher doesn't get to leave for recess at the end of class like the sixth graders.  A little fresh air after breathing in rancid-smelling milk paint would be a wonderful thing!

Thursday, April 17, 2014

2014 Art Show, Over and Done

I'm very pleased with how this year's art show turned out:

What viewers saw walking in one of the doors from outside.

Heading into our sixth grade "Asian Gallery".
Students designed this whole display.

Sumi-e paintings and lotus books.

Lotus books and handmade paper dragon books.

Student made cards describing things they learned.

Sumi-e paintings displayed with cards.
And a few hallway shots:

Headed down the hall by fourth grade.  Papel picado banners hanging from ceiling.

More papel picado banner with displayed art show work.

Fifth grade art work.

Fourth and third grade work with banner overhead.
Other artwork, some that I was frantically hanging at four o'clock today:

JUST FINISHED sarcophaguses (seriously, finished them at 1 pm).

Another sarcophagus shot.  I've blogged about them before,
this year we used metallic Playcolor and I LOVE them!

These are our Frank Stella kinetic sculptures,
they've been up for a while.
I just didn't photograph them until now.

More kinetic sculptures.

Blue dragons over one of the offices,
been up for a while.

Red dragons--see, now the giant dragon has friends!

More red dragons.

Our Catlin paintings (and a student-made anti-bullying sign)
And because I love how a few of the third grade classes chose to display their pyramids, a classroom shot or two:

Pyramids were made in art, paper students were made in their classrooms.

From the front: aren't they adorable?

Spitting image of them, I tell ya!

Oh no, he's falling over!

It's such a process to get it all together, and if you've missed previous posts, you can read about getting ready for the art show here, or you can read about last year's art show here.
So, another art fair is in the books, and I'm feeling very proud and relaxed now that the day is over. ['Cause I'm kind of a cranky, anxious mess leading up to Art Fair Day!]

Tuesday, April 15, 2014

Everyone Loves Elmer

These adorable Elmer the Elephant masks saved my tail in getting ready for the art show:


Let me set it up for you: MOUNTAINS of first grade work, previously organized into student portfolio folders (folded sheets of paper with their names on them), long sheets of black paper, ready to have work glued to it, student names printed onto labels. . . and so little time to get it all together.  So,I had students start their masks by folding 18 x 24 paper and laid the patterns on their paper on the fold . . . once they were all tracing, letting me check before they cut (one class was a little lax on the letting-me-check part, so there's a LOT of tape down the middle of their masks), I started frantically calling students back to choose their two favorite works from their portfolio for me to glue to the black paper while they worked on their elephant masks.


This project took two days, and between their first and second time, I went through and cut their eye holes for them.  I kept their mask folded, inserted a hole punch as far as I could, punched and then used scissors to cut their eye shape.  They were pretty perfectly placed for first grade faces!


The first day we worked on these, they walked out with their portfolio of work (classroom teachers were NOT loving me that day: picture 25 first graders walking with a paper folded over those giant peacocks, paintings, drawings and dropping them all the way down the hall).  When they returned, we read Elmer and the Kangaroo which is a great story about Elmer being kind to a stranger who becomes a friend.  Telling the truth here, I just sent our library clerk a request for "some Elmer books" and read this one cold and it turned out great.  So, some of the student's elephant masks aren't too Elmer-y because they didn't really know who he was until we read the book.  But it turned out, because all their elephants were so very colorful:


And one more thing: I don't add a string to hold the mask on because it's a pain and they always rip.  I just have them hold them because they're HUGE and it works out.  If time permits, we have an "elephant parade" through the halls on our way back to our class.  I selfishly view this as making up to the first grade teachers for those huge and messy artwork portfolios, delivering their class to them so they don't have to walk down to my room :-)

Wednesday, April 9, 2014

If George Catlin Were a Fourth Grader. . .

I love this lesson.  It's an oldie-and-a-goodie for me.  

Sorry, I took this one while in the drawer and
there's some overlap in the corner.

I've done this lesson forever.  Simple and basic and awesome.  We start out learning about George Catlin and his Indian Gallery, and use this site, which is amazing, but a word of warning: if you "preview" the people talking around the campfire (or have back-to-back fourth grade classes) it only lets you view it once a day. (Maybe you could re-start your computer?)  I will be devastated the day they take "Campfire Stories with George Catlin" down.
So, we learn a bit about Catlin, and then view his Indian Gallery (also on the site) and look for three quarter portraits.  I lead them through drawing a three quarter portrait on manilla paper with pencil.  Everyone does this basic step together (where the features go, how to make the shoulders go off the paper, etc) I made a super-simple power point of Catlin's images that scroll through on a five second delay for when we work on our own drawings so students can see "typical" American Indian clothing, hairstyles, jewelry, etc.  We're not going for historical accuracy exactly, more an overall feel.  Here are some in process works:

Just need to finish the background and add a few details.

Am I the only one who loves crooked eyes?
It just shows that they totally did it on their own!

You can really see his preliminary drawing here.
I will say to make the idea of three quarter portrait more real to them, I spend time reminding them of when we get our school pictures taken, and how the photographer always has you tilt your head slightly?  And you feel a little awkward?  The kids totally understand!

Didn't really get the three quarters thing down, and the eyes,
oh, the eyes!  But I love the shirt and feathers.

Can we talk power shirt and war paint?  NICE!

Such a friendly looking American Indian friend!
We use the Crayola multi-cultural paint for the skin (terra cotta or mahogany), then add brown for the darker/shaded areas and white or yellow for the highlighted areas.  The first day painting is spent only painting skin.  The next time I do a mini-lesson on eyes, and they do eyes, hair, and leather (yellow + brown).  Then they have a day for war paint, accessories and background, and a final day of details.

I think I went to high school with this guy.

Fabulous eyes and earring on this one.

I can't wait to see this one finished!
These will be hung near our front door for the art show, our very own Indian Gallery!
Pin It