We started out reading My Friend by Beatrice Alemagna. You could buy it super-cheap on Amazon here (I bought mine at one of those damaged freight kind of places that most teachers frequent).
We then fingerpainted, one day mixing primary colors, and one day mixing secondary colors (each student ended up with two papers).
This was just a fun, let-down-your-hair sort of day. Little tip I picked up in student teaching: have students paint with one hand and have them clean that hand off the best they can with paper towels before washing, so much less messy!
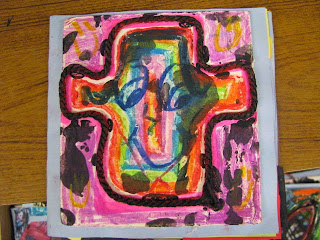
Next we used donated foam board and something called rosecord that I found in the cabinet when I started here 8 years ago to make a shape:
We then printed that shape onto our [dry] fingerpaintings. This ended up kind of a mess (think brayer cleaning). I use ice cream tub lids and we used tempera paint instead of ink (I've had problems with the ink staying sticky in the past, so we stuck with paint).
 |
| Sadly, this is the only photo I have of this step. |
We then started some books (I did have a master plan, but I'm pretty sure the students thought we were just doing a bunch of random lessons). I fell for these artist stamp sets in a catalog (I was going to link to them, but can't find them anywhere now). In the photo it showed the artist portrait with the artist's name under it. When they came: no name ANYWHERE on the stamp, front, back or side. They've literally sat on my shelf for years, but were perfect for this lesson. I gave 4-5 stamps per table, one pre-made "book" (i.e, three 6 x 12 pages stapled together in the middle) per student and some markers. I also opened up the scrap box and had the students make environments: country, city, underwater, etc.
 |
| Rainbow affect with one stamp being used over and over. |
 |
| Love how the artist is inside the castle! |
 |
| Salvador Dali! |
Students LOVED this. Everyone had a great time, they were super imaginative and amazing.
Next, we cut out our printmak'ed (is that a word? Or did I just make it up? Heck, it's May, I'm just going to go with it) shapes and remembered the Friend from the book we read eons ago.
Students added marker details and created a story (not really with words, only with pictures).
Then we colored our foamcore/rosecord shapes with oil pastel and glued it to our front for a cover:
The final step is to add an "About the Artist" sheet on the back:
While these did take a really long time, the students loved making them, and they learned so much along the way. (Confession: we'll be working on them until the very last second, so maybe I shouldn't use past tense here).
A few more photos, just because they're Ah-Mazing!
 |
| At the beach. |
 |
| Formal wear. |
 |
| Walking down the street. |
 |
| I think this is me. At the lake or beach or next to my kid's kiddie pool. Summer is soooo close! |


No comments:
Post a Comment